| |
||
Overview
The ProblemAt some point you will face the task of replacing or adjusting one or more v-belts. It could be that one simply snapped or it could be part of a routine maintenance inspection. If the v-belt simply snapped you simply buy a brand new one. If it is a routine maintenance you should inspect two things - the condition and the tension of the v-belts. Tools, Skills And PartsThe job is very easy to perform and does not require any kind of special tools. Difficulty Level
The following tools are required for this particular work (tools marked with green checkmark are optional).
The following spare parts are required for this particular work (parts marked with green checkmark are optional). Note that the BMW internal numbers are intended for a BMW 535i E34 -89.
IntroductionThere are two v-belts (three if your car is equipped with A/C) on an M30 engine. All v-belts are driven from the crankshaft via the crankshaft pulley. Let's go through what functionality each v-belt is responsbile for - we start with the v-belt closest to the engine and work us away from the engine.
Take a look at the pictures below which gives you an overview how the v-belts are located. In the first picture the engine has been removed from the car for clarity :-) 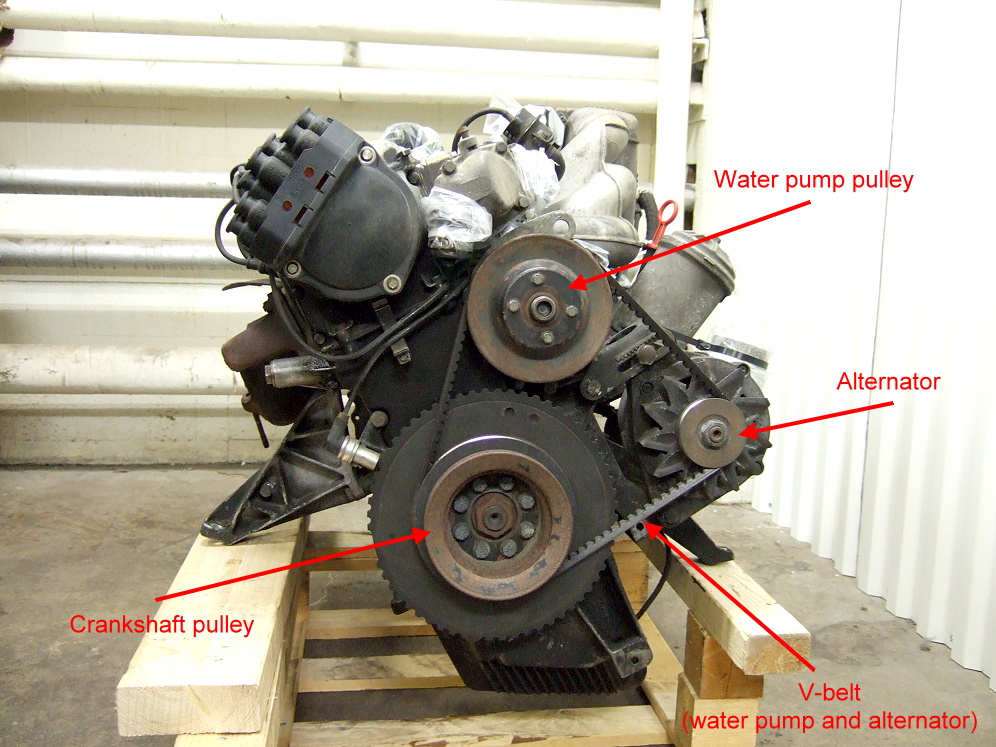 Overview of one of the v-belts and the main components. Note that the primary cooling fan is mounted in the left-hand threaded screw in the middle of the water pump pulley. 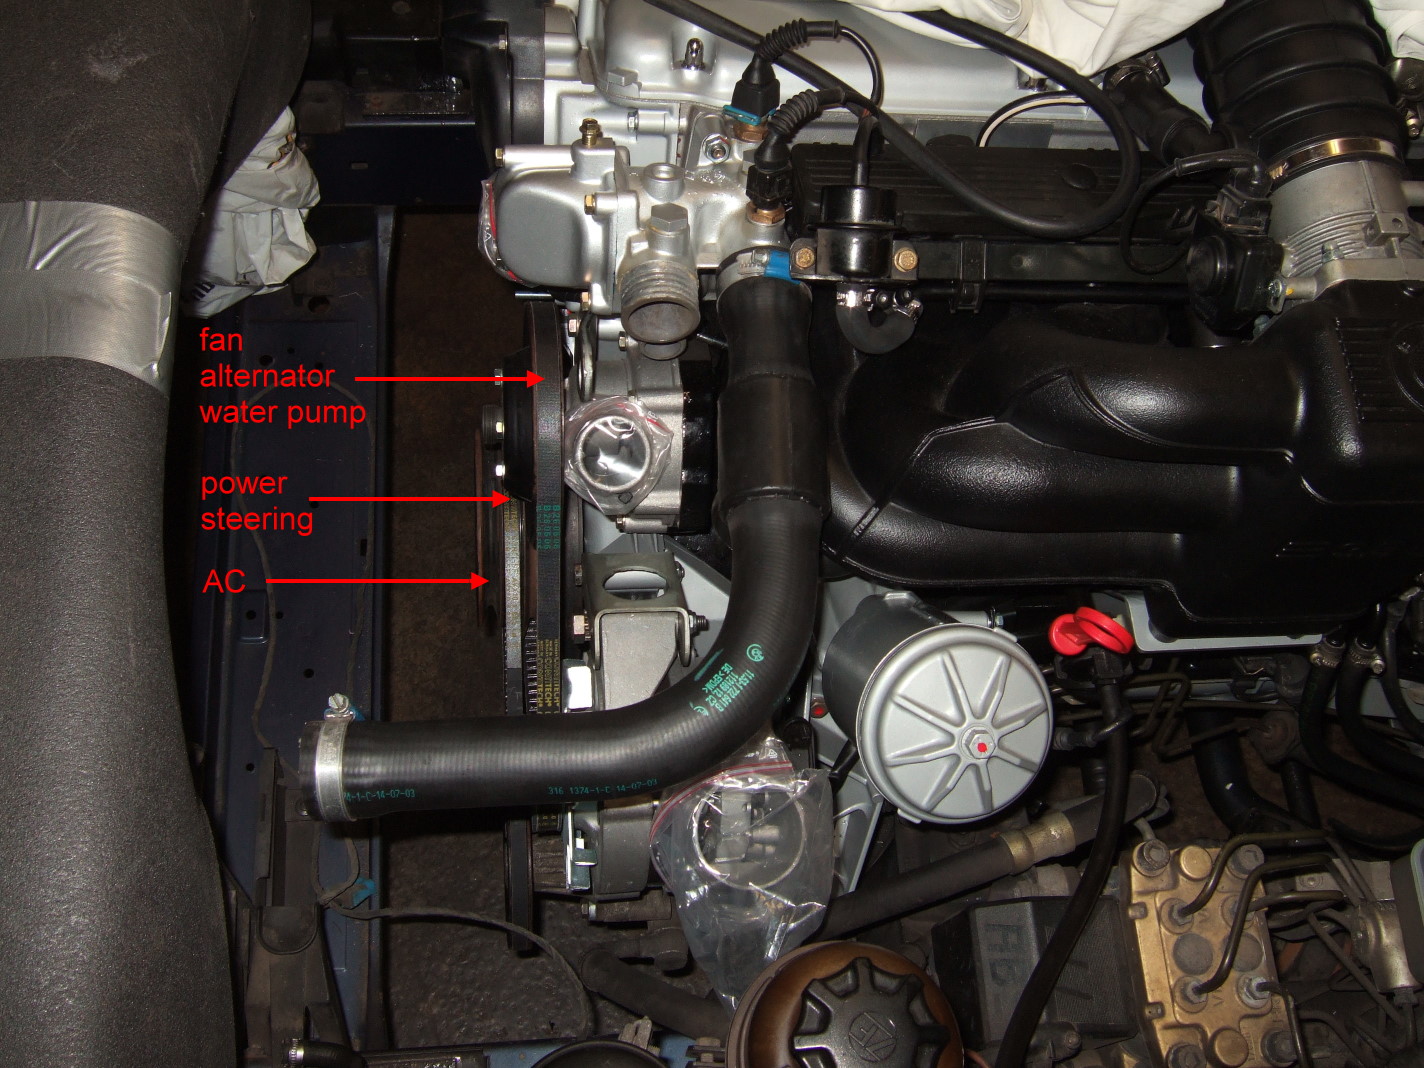 Sideview of all the v-belts (except the AC). Closest to the engine is the fan+waterpump+alternator v-belt and in the middle the power steering pump and furthest from the engine is the AC. Regular inspection of the v-belts are an important part of the maintenance schedule. First inspect the v-belts for any sign of wear and tear. See the picture below for examples. If any indications of damage on any v-belt you should replace it. 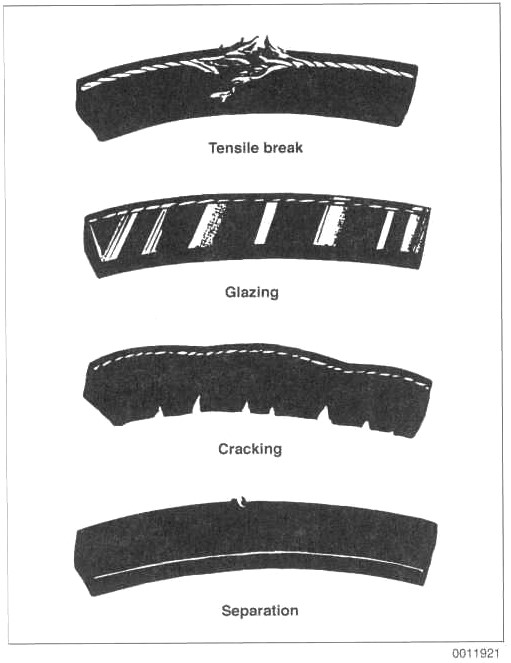 Examples of v-belt failure (picture from Gates Rubber Inc.). The second thing to inspect is the tension of the v-belts. If these are not tensioned correctly you will decrease the life of the v-belts and/or the components they are driving. If a v-belt is too loose it will in most cases generate a squealing sound but you might also experience reduced or incorrect funcionality of the components it is supposed to drive. Very loud squealing indicates a replacement is needed - tensioning will not solve the problem. If a v-belt is too tight you will damage the components it is supposed to drive. For example you will greatly shorten the life of your water pump and alternator. The reason for reguarly inspect your v-belts is quite obvious when you see the units driven by v-belts. If your 3rd (furthest away from the engine) v-belt snaps you will just loose the A/C functionality - no problems continue driving. If your 2nd v-belt snaps you will loose the power steering - no major problems continue driving, just avoid that narrow and tight parking lot! If your car is equipped with LAD system (self-levelling rear suspension system) you will also loose that functionality since the system is using the power steering pump to provide hydraulic pressure to the rear shock absorbers. If your 1st v-belt snaps you will loose engine cooling ability (water pump and primary cooling fan stops working) and steady electric current supply (only the start battery to drive all electric equipment) - you have to stop more or less immediately due to quickly increase of engine temperature. Adjusting The V-Belt (Power Steering Pump)The principle is quite simple - for each v-belt there are one component equipped with an adjustment mechanism. In this case the power steering pump is the only component and is therefor equipped with the adjustment mechanism. The adjustment is made possible thanks to an tensioning gear screw in a toothed-rack mechanism. The tensioning gear screw is simply a 19 mm hex head screw with some tooths on it located in a toothed-rack mechanism. By turning this screw you can adjust the tension in the v-belt. 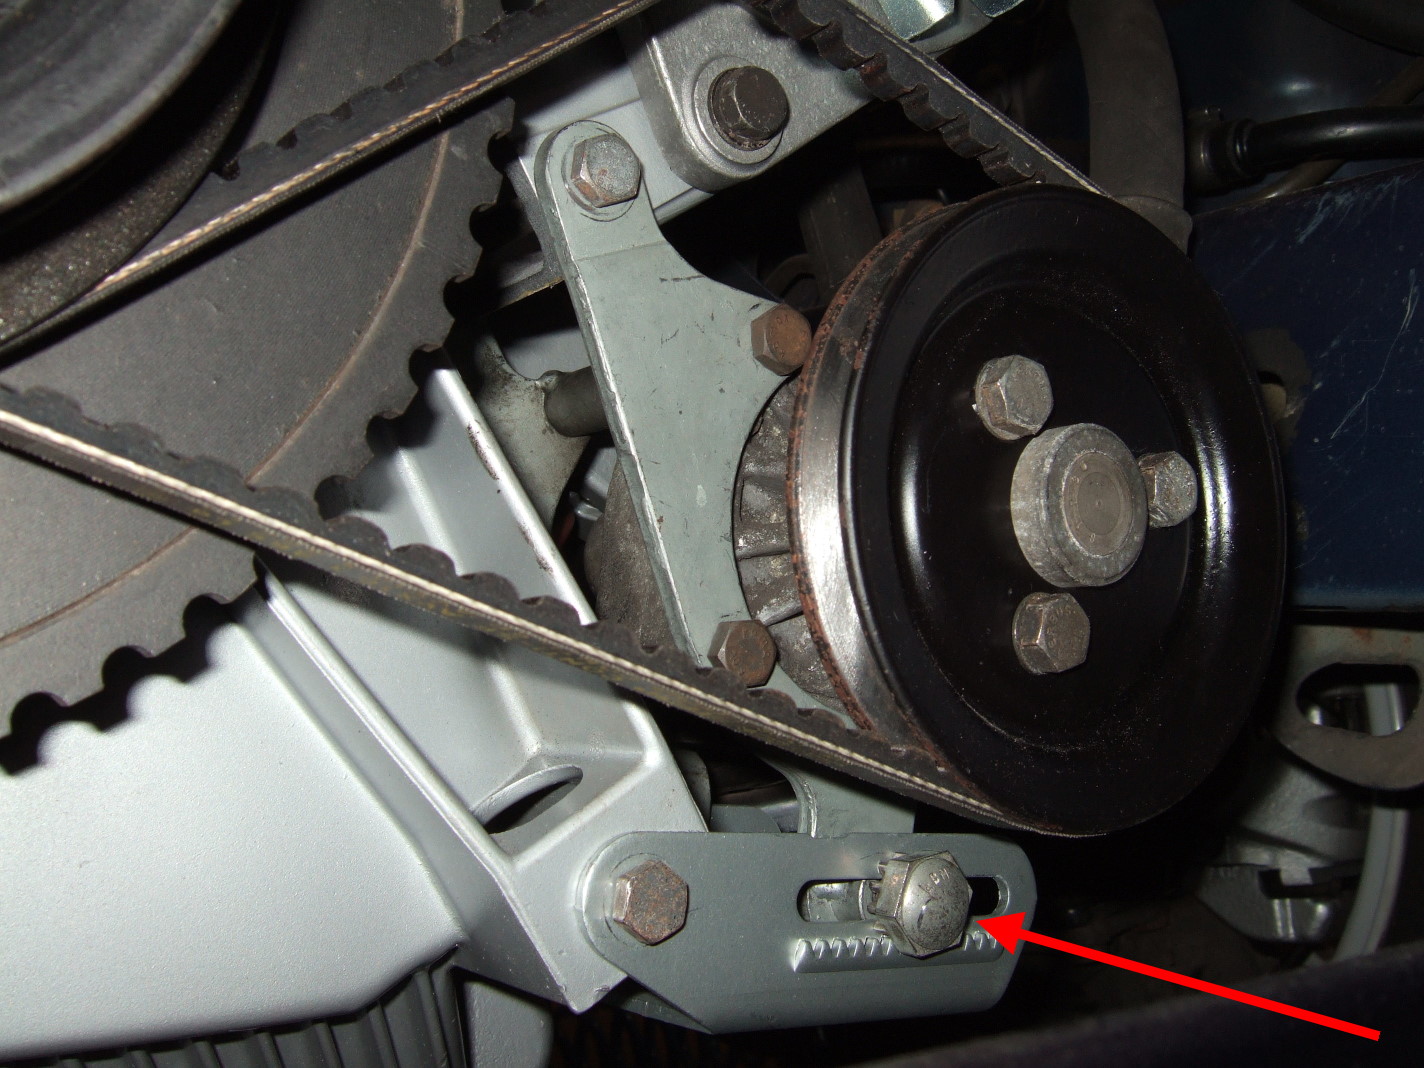 The red arrow points to the 19 mm hex head screw - the tensioning gear screw. But before you can adjust the tension you need to undo two screws and one nut! After that the power steering pump can move freely around the pivot points and you can slacken/tension the v-belt. Once you're happy with the tension you simply tighten up the nut and the two screws. Step 1 : Nut #1 Start by undo the 13 mm nut found at the other end of the tensioning gear screw, see the picture below. Just undo a couple of turns - it's enough. 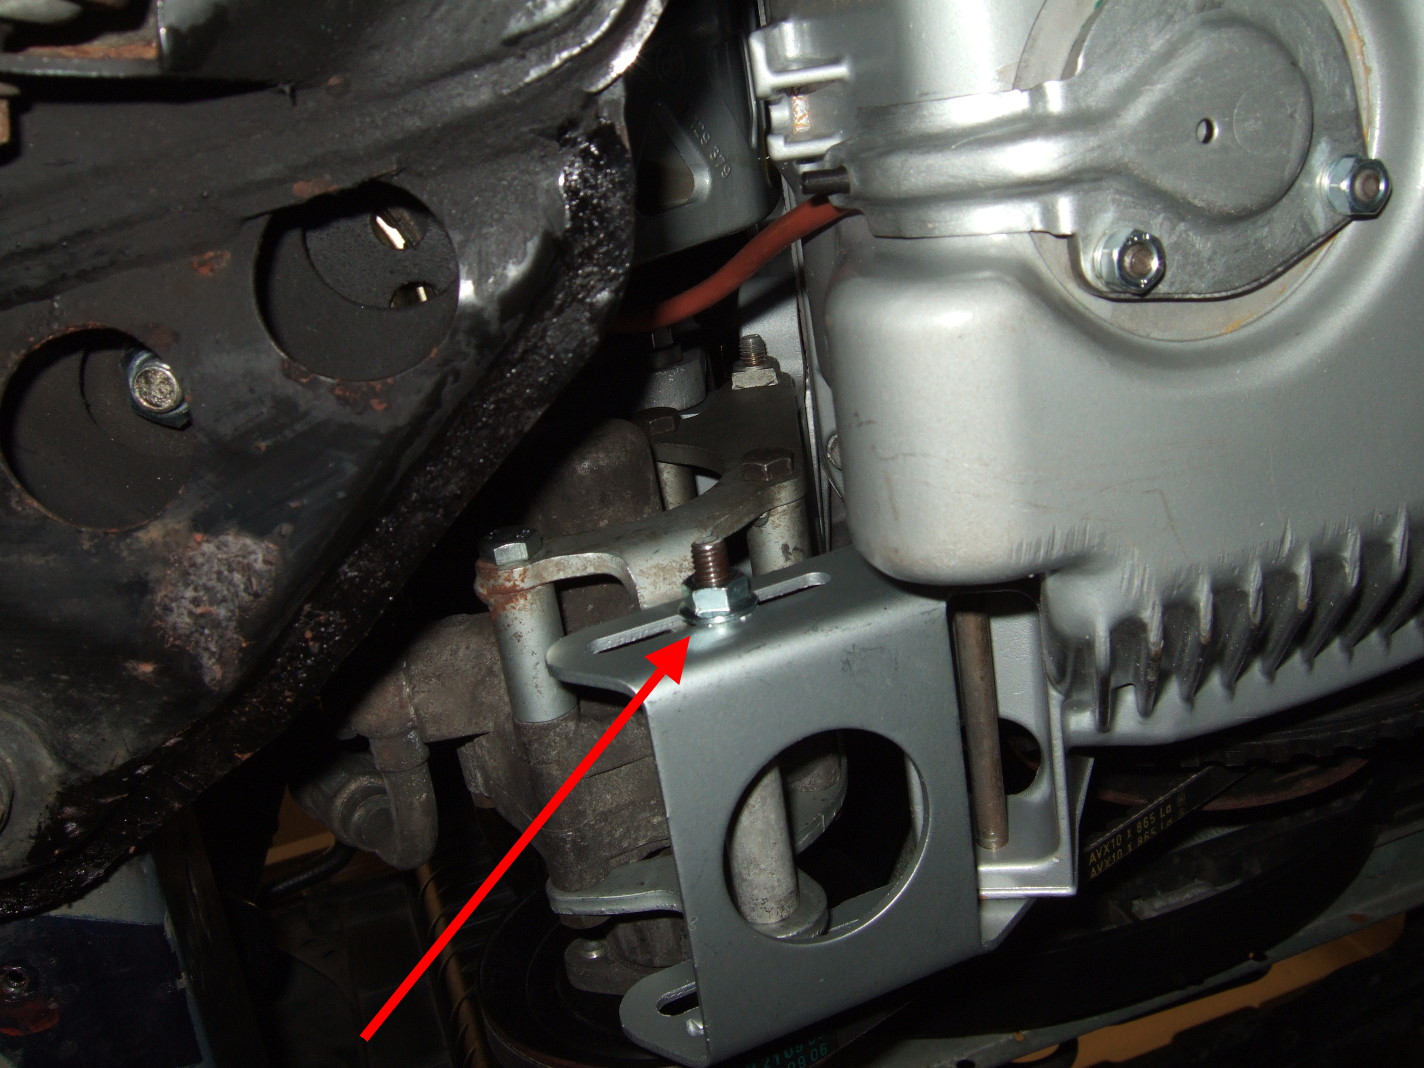 The red arrow points to nut at the other end of the tensioning gear screw. Step 2 : Screw #1 Undo the screw pointed out by red arrow in the picture below (13 mm hex head). Just undo the screw a couple of turns. It is a welding nut at the other end so you don't have to worry about a counter-hold or similar.  The red arrow points to the screw to undo a couple of turns to make it pivot easier. Step 3 : Screw #2 Now undo the very last screw pointed out by red arrow in the picture below (13 mm hex head). Just undo the screw a couple of turns. It is a welding nut at the other end so you don't have to worry about a counter-hold or similar. 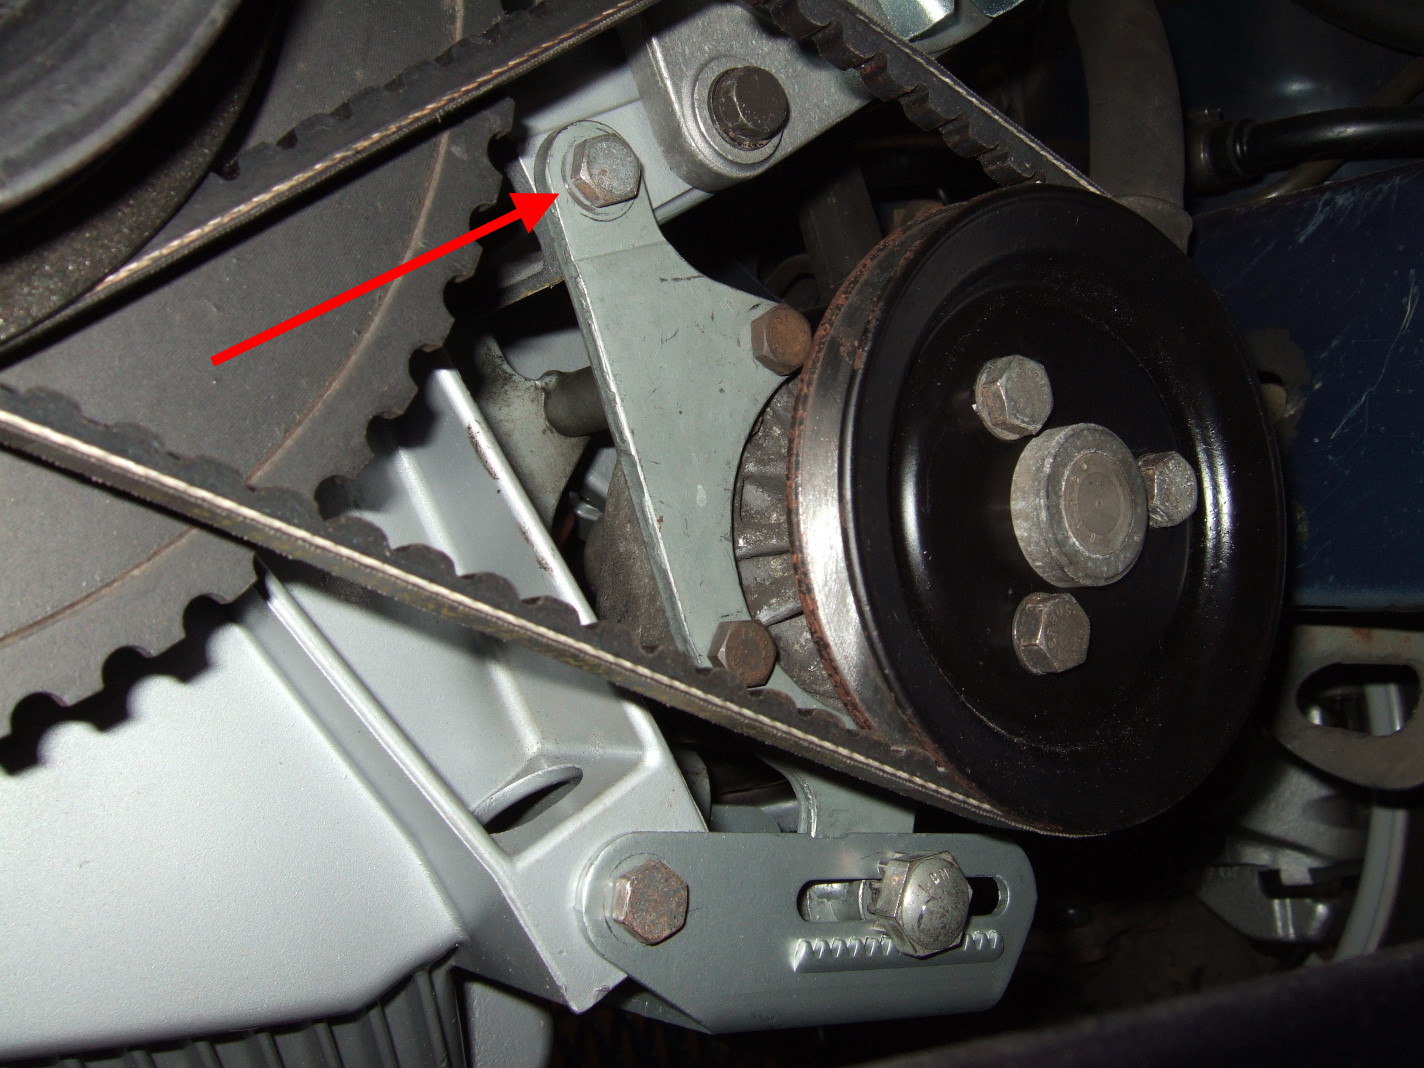 The red arrow points to the screw to undo a couple of turns to make it pivot easier. Now you should be able to slacken or tension the v-belt by turning the 19 mm hex head on the toothed-rack mechanism. If it isn't moving easily, place a tire lever or similar to aid the movement of the power steering pump. The teeths on toothed-rack mechanism is not designed for any larger forces - it will just jump over tooths and you will wear them out if you apply to much force. Turn the tensioning gear screw away from the engine (clockwise) to tighten the v-belt or towards the engine (anti-clockwise) to loosen the v-belt. You can either apply around 8 Nm on the tensioning gear or push firmly in the middle of tow pulleys and if c-c measure between the pulleys are 180-280 mm then it should deflect roughly 6 mm (and 13 mm if the c-c measure are 300-400 mm). When correct tensioning is reached - keep it in position with the help of a tire lever or similar and tighten up the nut for the tensioning gear screw and then tighten up the remaining two screwa. Recheck for correct tensioning after tighten all nuts and screws and you have been running the engine for a couple of minutes. 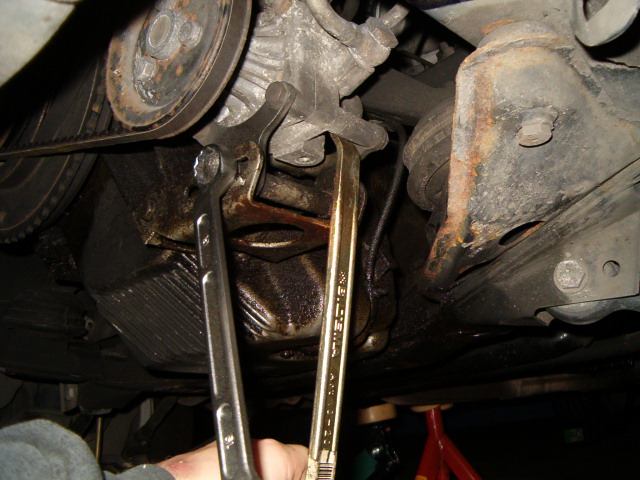 Use a tire lever to aid the movement when adjusting the v-belt with for example a 19 mm box-end wrench. |
Adjusting The V-Belt (Water Pump, Generator, Fan)The principle is exactly the same as the power steering adjustment mechanism. It is however a lot easier if you remove the fan (it is possible with the fan installed but it isn't that much space to work with). You only have to remove the fan, you don't have to remove the fan shroud. Undo the locking nut at the other end of the big 19 mm hex head tensioning gear screw. Undo the pivot point consisting of a 13 mm heax head screw and a 13 mm nut. Just undo until the generator can swing freely. Adjust in the same manner as for the power steering v-belt. When you have proper tensioning, tighten the locking nut and the pivot point consisting of a screw and nut. 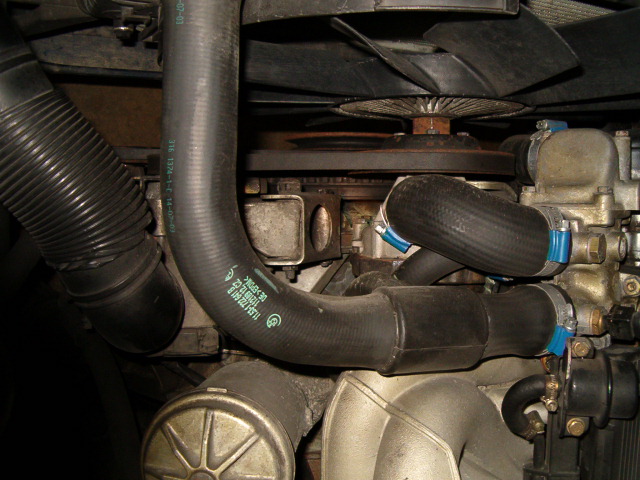 The toothed-rack adjustment mechanism (with the 19 mm hex head tensioning gear screw) for the water pump v-belt. Tightening Torques
|