Removing Windshield Wiper Console
The console is mounted with a L-shaped mounting bracket as seen in the picture below.
It is recommended to completely remove the L-shaped mounting bracket. This will make
the removal of the windshield wiper console easier. The L-shaped mounting bracket
is mounted with two 10 mm hex head screws.
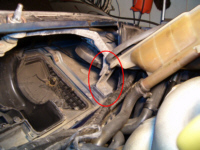
The L-shaped mounting bracket marked out that holds the windshield wiper console in place.
Remove the 27 mm nut from left and right wiper arm shafts. If you find these nuts hard to loosen,
spray some CRC 5-56 and wait a minute or two to let the fluid work. Use a 27 mm box-end wrench or
an extra long 27 mm socket together with a ratchet wrench. A normal socket will most probably not
work due to the height of the wiper arm shaft. An adjustable wrench is not recommended to
use due to the location of the nuts and also the risk of slipping and damage the windshield.
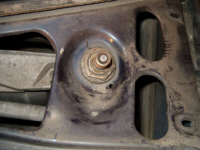
The 27 mm nut holding the wiper arm shaft.
The last step before you can remove the windshield wiper console is to
disconnect the electrical connectors. These can be found directly under
the left wiper arm shaft. The black connector is for control and power of
the wiper motor. The white connector controls the pressure on the left
wiper arm (if the car is equipped with the ADV system that is).
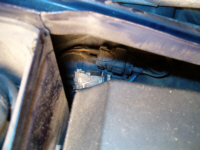
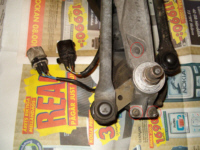
The black connector (control and power for wiper motor) and the white connector (control
for left wiper arm pressure) which both can be found under the left wiper arm.
Now the windshield wiper console is completely free and it is possible to maneuver it
out from it's location. Start by pressing down right wiper arm shaft through the hole.
Turn the whole console down towards the bottom of the engine compartment at the same time
you carefully coax out the console. It may take one or two attempts before you get it out.
|
Transfer Parts
Now it is time to transfer the wiper motor and two plastic caps from the old
wiper console over to the one. Before removing the wiper motor the linkage
location should be marked. Use a awl or a marker pen or similar to mark where
the linkage is located on the wiper motor as shown in the picture below.
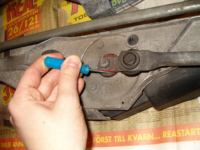
The linkage location at the wiper motor should be marked as shown with the red lines in the picture.
Unscrew the 13 mm nut and remove the the linkage crank from the wiper motor. The linkage crank
is removed by lifting it straight up (it is connected to the wiper motor shaft via splines).
Then unscrew the three 10 mm hex head screws holding the wiper motor. Now it shall be possible
to remove the wiper motor and transfer it to the new wiper console.
If your car is equipped with ADV then this must also be moved to the new wiper console. Simply
remove the unit by unscrew the three Torx T25 screws as seen in the picture below and remove it
by pulling it out from under. If necessary, clean the ADV pressure pin and add new grease, then
simply mount it on the new wiper console.
For those cars equipped with ADV this unit has to be transfered from the old to the new wiper console.
The unit is mounted with three Torx T25 screws and their locations are marked with red circles.
Now the blower motor and (if you car is equipped with ADV) the ADV unit has been
moved from the old to the new wiper console. Do not forget to move over the two
plastic details. One rectangular and one round plastic cap.
Putting Everything Back
The installation is reverse of removal. However here are some tips that can be useful.
When installing the blower heater housing, try to move the cables as much as possible
thus creating more maneuver room. Also remember to make sure the flaps are in closed
position when installing. Verify after the installtion that the flaps still are in
closed position.
To install the blower motor, mount the metallic clip first. Then move the motor and
fan wheels in place and then attach the connector. Mount the metallic clip with the
two screws. It is now a good time to make a quick test of the blower motor, fan wheels,
fan speeeds and flaps. Make sure everything works before proceeding.
|

