| |
||
|
Now remove the four plastic hex head nuts (two on each side) which holds the metal shield covering the cable bundle. Use a 10 mm socket together with a ratchet wrench or similar tool to remove the nuts. 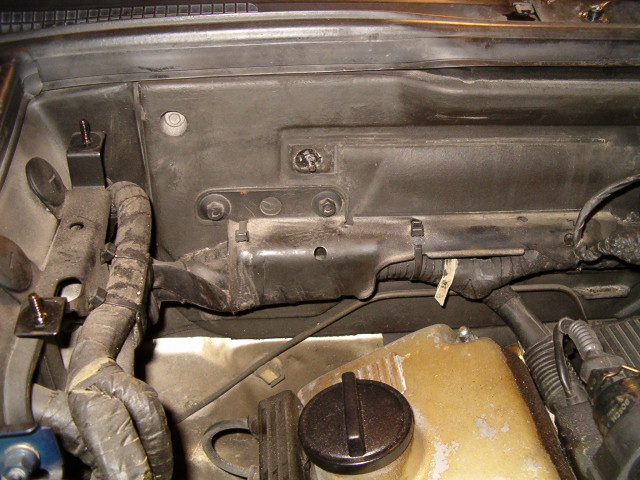 The two 10 mm plastic hex head nuts holding the right part of the metal shield.  The two 10 mm plastic hex head nuts holding the left part of the metal shield. Now it should be possible to remove the metal shield covering the cable bundle. Just pull it straight out. However it can be stuck quite hard...  After the two 10 mm hex head nuts have been removed, it should be possible to pull the metal shield straight out. Removing Bulkhead Splash ShieldStart by removing the rubber trim found around the left, right and rear of the engine compartment. The rubber trim is in one large piece. Just push it straight up, it should be easy to remove. 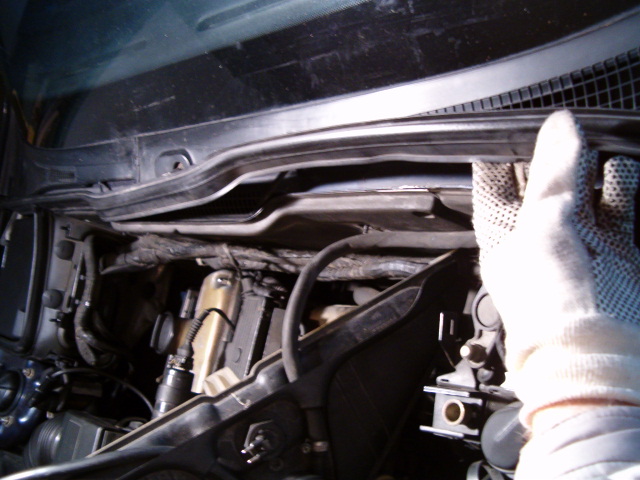 Removing the rubber trim around the engine compartment. Next try to find all five 7 mm hex head metal screws which the bulkhead splash shield is mounted with. The approximate location has been marked in the picture below. Use a 7 mm socket together with a small ratchet wrench for the upper two screws. For the ones found further down, use a very small ratchet wrench. A very small box-end wrench will also work. Some screws can be a little time consuming to remove due to the small space available for your tools.  Picture of the bulkhead splash screen with the five 7 mm hex head screws holding it in place marked out. After having removed all the five screws, simply pull the bulkhead splash shield apart as shown in the picture below. Please note that around the shield there are a sealing. Be a little bit gentle not damage this sealing. The shield can also be stuck quite hard, but some patience and careful pulling it will come loose. 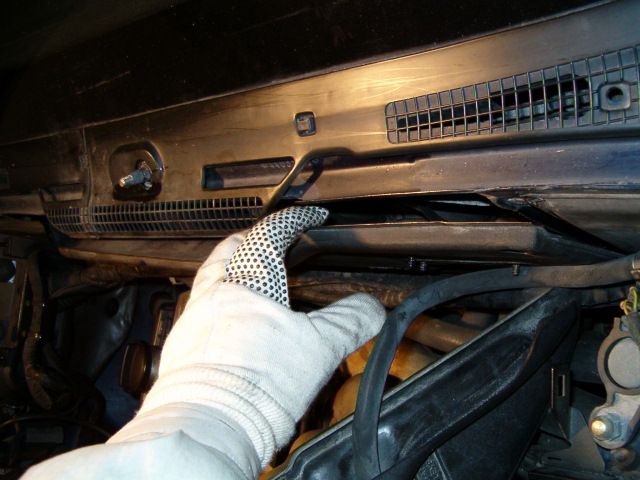 The bulkhead splash shield is just about to come loose. 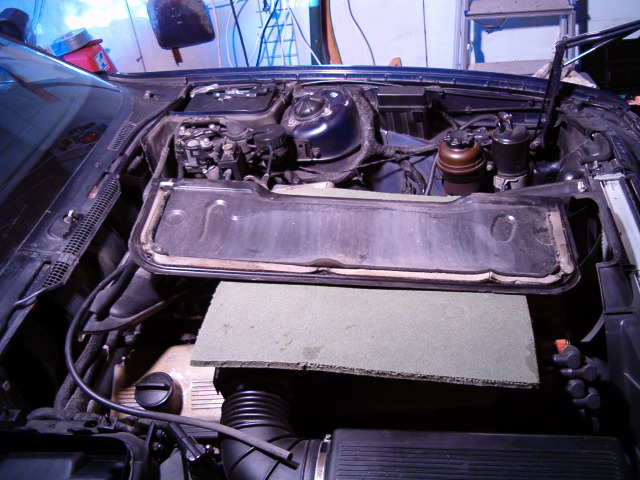 The bulkhead splash shield with the inside visible. 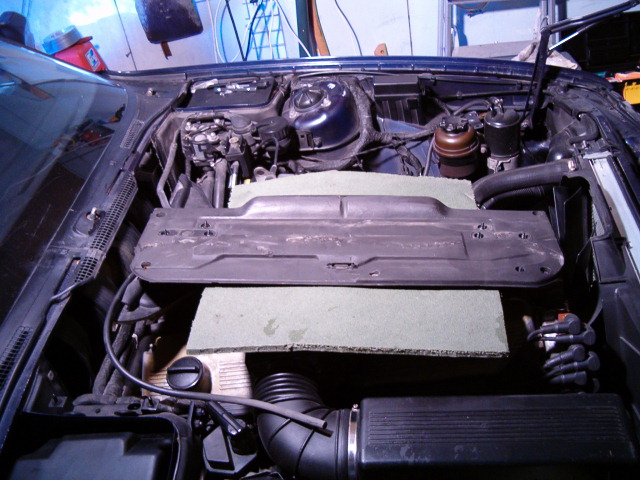 The bulkhead splash shield with the outside visible. Removing Moulding GrilleBefore the blower motor together with the housing can be removed smoothly, the moulding grille should be removed. It is mounted with a set of retaining clips. Note that these are very very easy to break when removing them, especially if they are old and been on the car for some years. So order a fist of these clips, they are cheap and can be good to have in the future. Use a 3.5 mm flat-blade screwdriver and carefully pry up the upper part of the retaining clips. It's even easier to use two screwdrivers, one at each side of the clip, and simultaneously pry it up. |
In the picture below four of these clips have been removed from the left side. The moulding grille consists of two parts, one at the left and one at the right. Simply remove all the clips and lift off the left and right moulding grille. 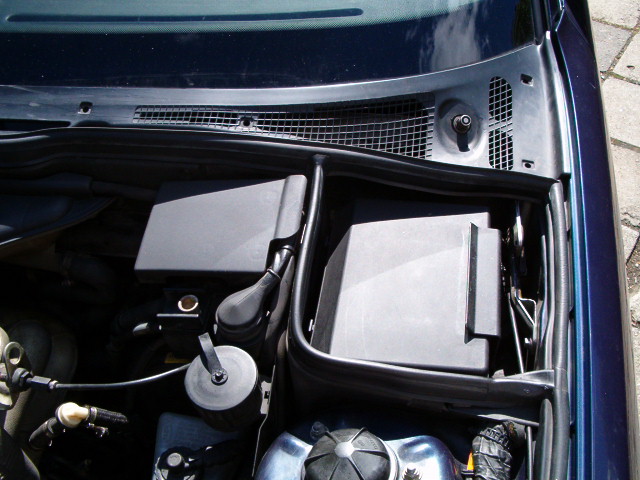 Four moulding grille retaining clips have been removed from the left part of the moulding grille. Removing Blower MotorThe cover over the blower motor is simply held by two rows of plastic clips. There is one set of row at each side of the blower engine. To unhook a row of clips, place a flat-blade screwdriver at each end of a clips row and gently pry it loose. When both rows of clips are loose it is easy to remove the plastic cover. The blower motor and the two fan wheels should now be visible.  The blower engine cover which covers the blower engine and one fan wheel at each side.  One of the two clips row loose of the blower engine plastic cover. The last step which has to be made before the blower motor (together with the two fan wheels) can be unmounted is to remove the metal ribbon holding the blower engine. Unscrew the two srews using a Pozidriv PZ2 screwdriver and gently pull up the metal ribbon halfways. Now disconnect the electrical contact to the blower engine by gently press together the two plastic pieces and pull straight up. It shall now be possible to easily lift out the entire assembly consisting of the blower engine and the two fan wheels. 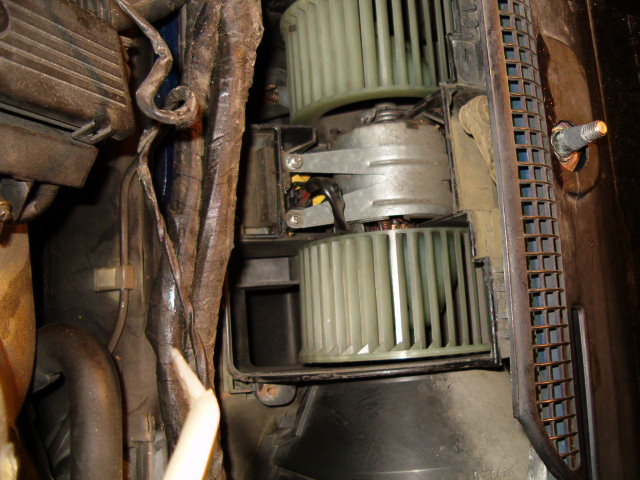 The blower engine visible between the two fan wheels. The blower engine is held in place with a metal ribbon mounted with two Pozidriv PZ2 screws. Use a standard Pozidriv PZ2 screwdriver to remove them. Removing Blower Motor HousingNow we are close to be able to reach the windshield wiper console. But first the housing, where the blower engine once was mounted, has to be removed. The blower motor housing is mounted with in total eight 6 mm hex head screws and two metal clips found inside the left and right air duct. Note that these screws has a quite low height on the hex head which might cause some slipping with certain variants of sockets. Recommended tools are a very small ratchet wrench and a 6 mm socket together with a very small 6 mm box-end wrench. These eight 6 mm hex head screws can sometimes be hard to find. Below is schematic layout of where these screws are located.
        [Top]

   X             X

   X             X
        X   X
      X       X

      [Bottom]
The two metal clips, or spring retainers, are located inside the left and right air duct. See the picture below for a description of the location. Simply release (pry back) these spring retainers. Be careful not to bend too much, just as much so they come loose. It shall now be possible to maneuver out the whole blower motor housing. It looks impossible but it will take some attempts. 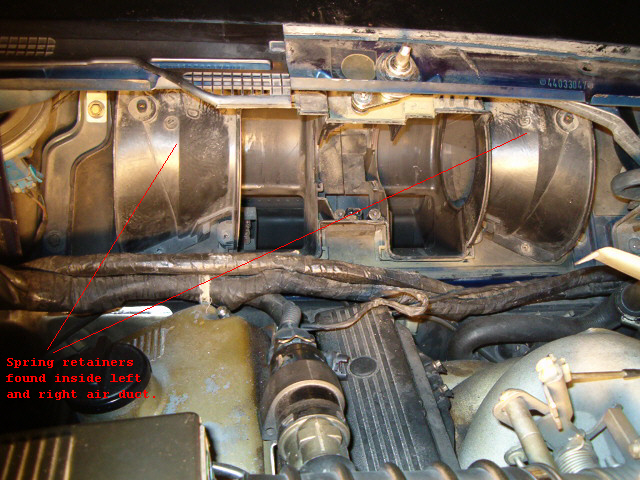 View of the rear engine compart after the blower motor and the blower motor housing have been removed. If everything went fine the blower motor together with the blower motor housing shall now have been removed. They rear engine compartment will probably look something like the picture below. 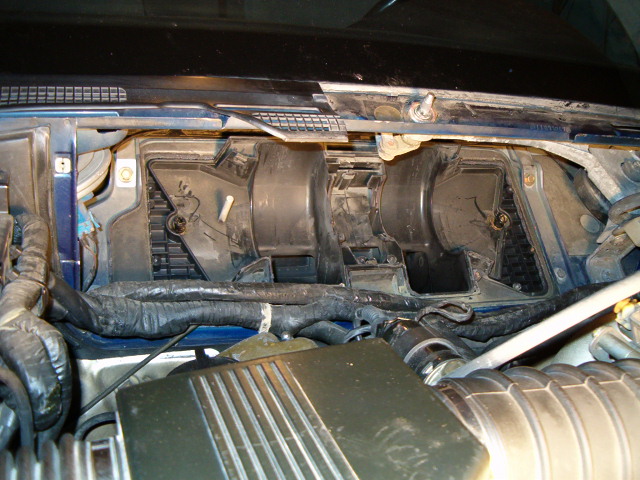 View of the rear engine compart after the blower motor and the blower motor housing have been removed. |