| |
||
Overview
The ProblemIf you experience the engine to be hard to start on rainy mornings or seems to misfire throughout the entire rpm range, then you might want to take a closer look at the distributor cap and rotor. However BMW does not specify a replacement interval for the distributor cap and the rotor. These are vital parts in the ignition system, just as vital as for example the ignition cables. In the picture below the different parts forming the "middle" part of the ignition system is shown. The rotor (13) is driven directly from the camshaft and rotates inside the distributor cap (12) and distributes the single spark from the ignition coil out to all six spark plugs in a pre-defined order. 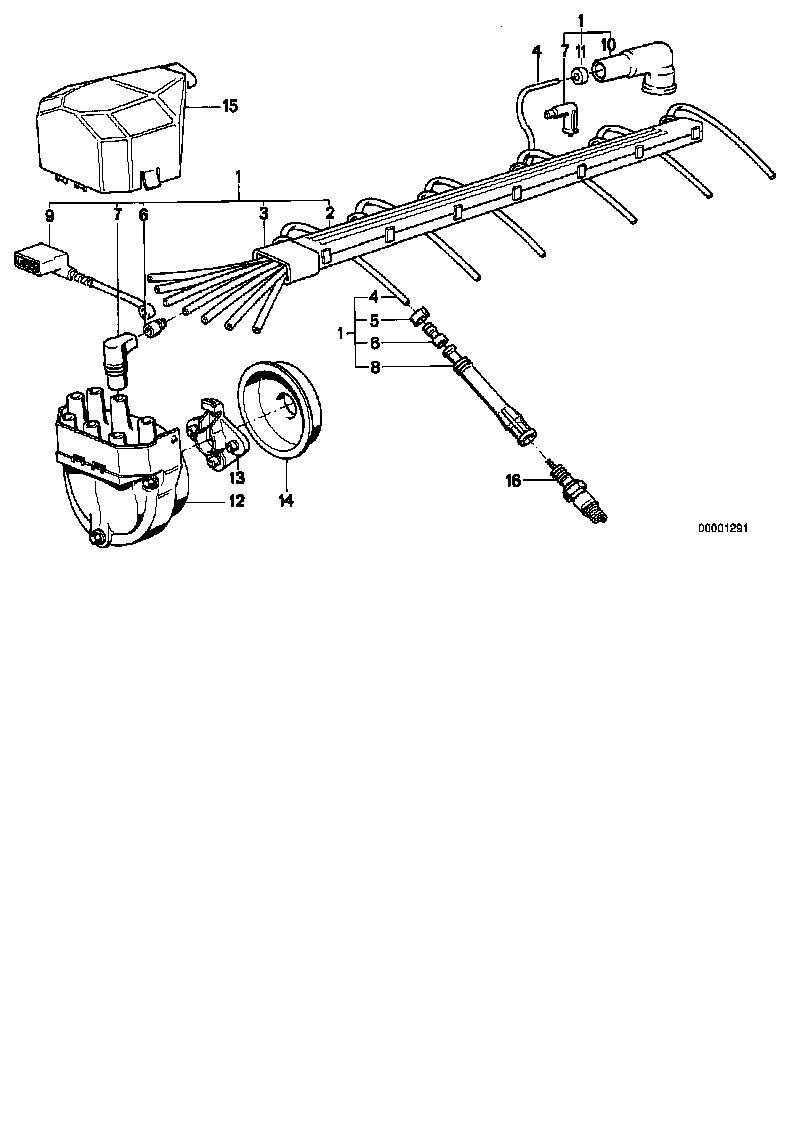 Overview of the distributior cap and the rotor. Tools, Skills And PartsThe job is pretty straightforward and does not include any special tools. Difficulty Level
The following tools are required for this particular work (tools marked with green checkmark are optional).
The following spare parts are required for this particular work. Note that the BMW internal numbers are intended for a BMW 535i E34 -89.
Removing Distributor CapThe first step is to remove the distributor cap in order to also get access to the rotor. Note that my car was missing the protection cap (number 15 in the picture above) covering the distributor cap and ignition cables. This should be removed first of course. Some sources recommends to remove the radiator cooling fan to gain better access for removal of the distributor cap. However I found it unnecessary to do so. There is of course not much clearance but I found it no harder to work with than any other places on the car. So my recommendation is not to remove the radiator cooling fan. 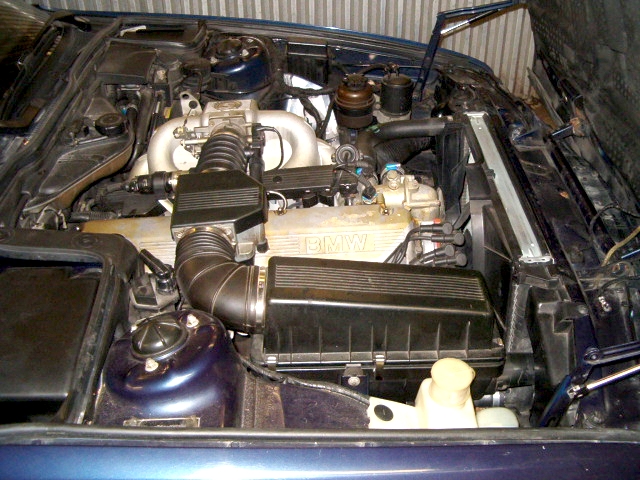 Engine compartment overview with the old distributor cap installed. Start by unscrew the three 8 mm hex head screws holding the distributor cap in place. Do not bother to unscrew the screws completely from the distributor cap, they are designed to stick to the distributor cap. Click on the picture below to see where the three screws are located. 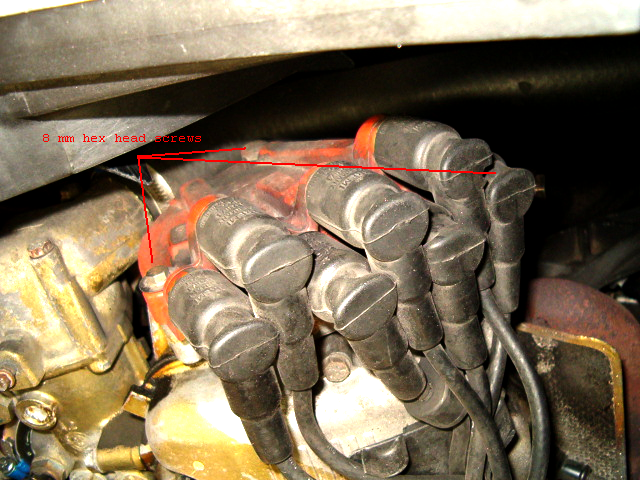 Click to see the location of the three screws holding the distributor cap in place. Since you probably haven't removed the radiator cooling fan you have to move around the distributor cap a bit to be able to find the way out. You probably need to disconnect two ignition cables since they are too short when you try to move around the distributor cap to find the way out. Tips! Do not remove the ignition cables directly from the old distributor cap when you have removed it. Leave them connected to the old distributor cap, mount the new distributor cap and then transfer one ignition cable at a time to the new distributor cap. This will minimize the risk of connecting the ignition cables to wrong port on the distributor cap. 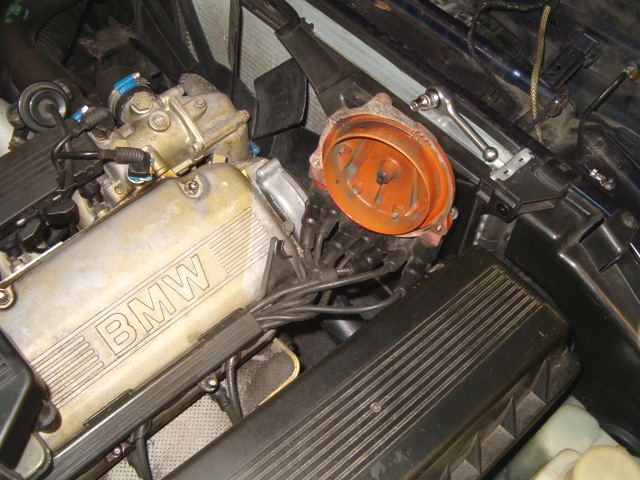 The old distributor cap removed but with the ignition cables still connected to it. |
Removing RotorAfter the old distributor cap has been removed it is pretty forward to remove the rotor. Use an Allen key to remove the three screws. Sometimes these screws can be stuck quite hard so be careful since 3 mm tools and screws are not that strong. The rotor can only be installed in one way so you don't have to worry about mounting it upside down or mark the position of the old rotor or similar. Simply unscrew it and mount the new one. 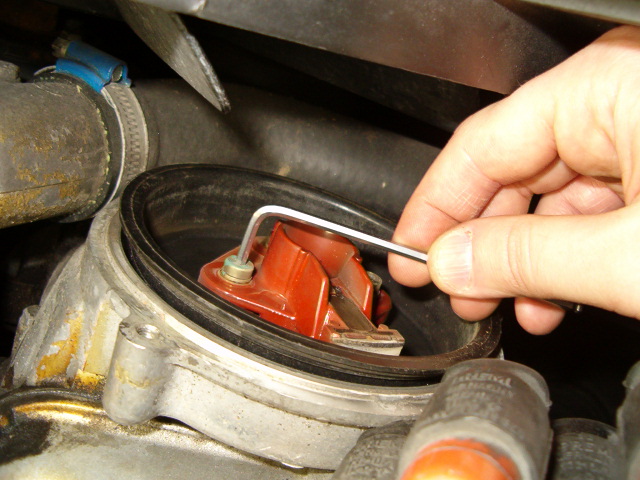 The rotor is mounted with three 3 mm Allen screws. After the rotor has been removed the black plastic cap (see the picture below) should be inspected for cracks. Also do a thorough investigation of the o-ring between the cylinder head and the black plastic cap. Replace if in bad condition. 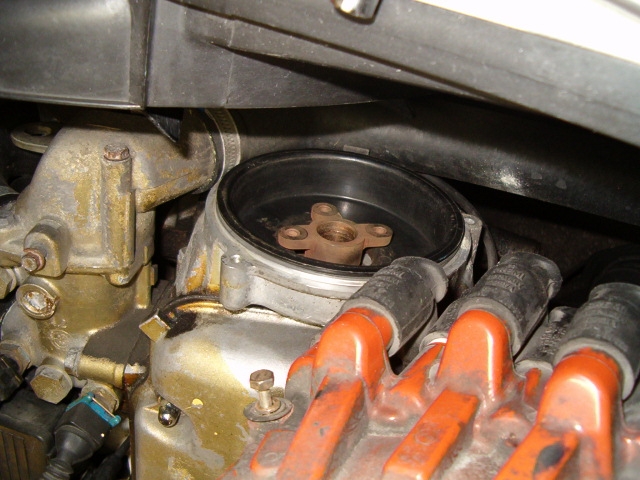 The rotor removed and the rotor adaptor is visible and the black plastic cap under it. AssemblyStart by mounting the new rotor. Make sure the rotor is fully inserted into the hole of the rotor adaptor. Do not overtighten the three 3 mm Allen screws. 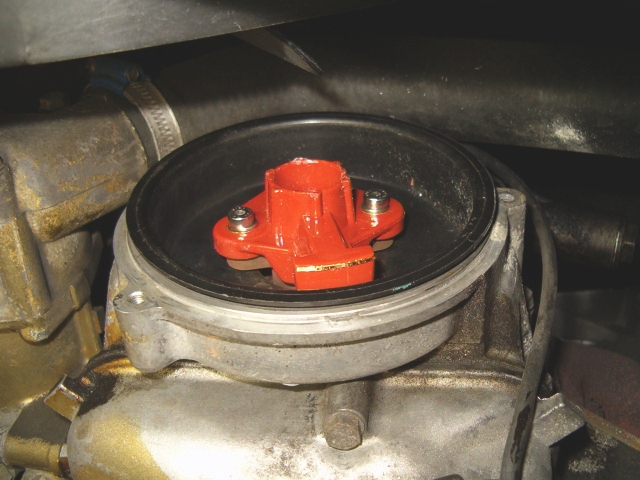 The new rotor in place. Next step is to mount the new distributor cap. This part is also pretty straightfoward and should not cause any problems. After the new distributor cap has been mounted start to move one ignition cable at a time from the old distributor cap to the one one. 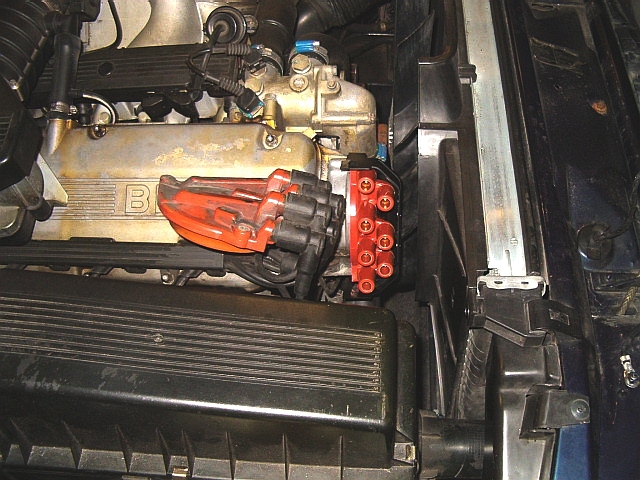 The new distributor cap in place. Still missing the ignition cables though. 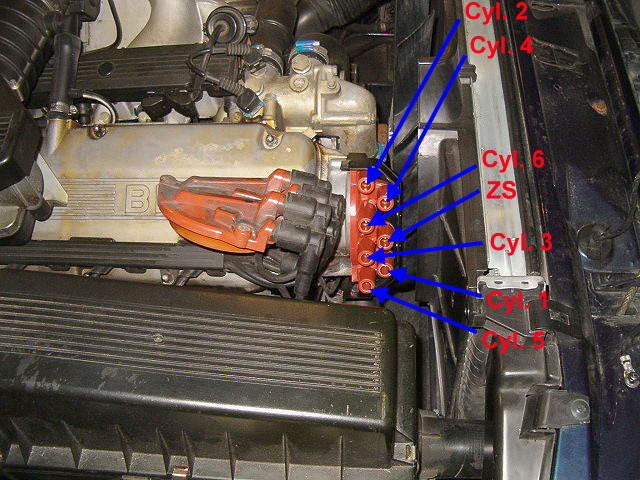 Location of ignition cables marked up. Cylinder 1 is the one closest to the radiator and cylinder 6 closest to the firewall. 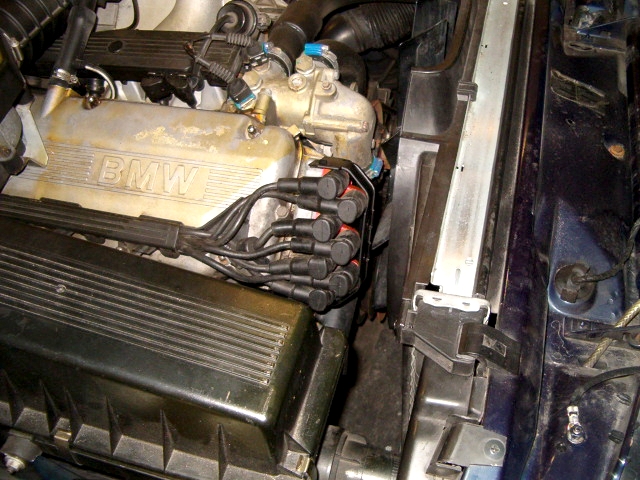 All ignition cables have been transferred to the new distributor cap. The very last step in this article is to mount the protection cap covering the distributor cap and the ignition cables. Simply press the protection cap in place and try to fire up the engine!  Everything installed and ready to fire up! Tightening Torques
|